

La física del ruido en interruptores magnéticos: identificando el "crujido del resorte"
En el panorama de periféricos para juegos de alto rendimiento, los interruptores magnéticos Hall Effect (HE) han emergido como una tecnología dominante debido a su ausencia de puntos de contacto físico y su activación infinitamente ajustable. Sin embargo, los entusiastas técnicos a menudo encuentran una anomalía acústica específica conocida como "crujido del resorte" o "vibración de la espiral". A diferencia del "ping" encontrado en interruptores mecánicos tradicionales —que suele ser una resonancia de alta frecuencia— el crujido del resorte es una fricción arenosa, táctil y auditiva que ocurre durante el ciclo de compresión.
En un interruptor magnético, el vástago alberga un imán permanente que se mueve hacia un sensor Hall en la PCB. Debido a que el sensor mide cambios minúsculos en la densidad del flujo magnético (medida en Gauss), cualquier inestabilidad mecánica o vibración irregular puede teóricamente introducir ruido eléctrico en la ruta de la señal analógica. Según el Libro blanco de la industria global de periféricos para juegos (2026), mantener la integridad estructural dentro de la carcasa del interruptor es fundamental para asegurar intervalos de sondeo consistentes de 0.125 ms (a 8000 Hz).
El crujido del resorte rara vez es un signo de fallo del sensor; más bien, es un modo de fallo mecánico donde las espirales del resorte rozan contra los rieles internos del vástago o donde los extremos del resorte están mal terminados. Esto crea una sensación "crujiente" que puede distraer a jugadores competitivos y, en casos extremos, afectar la precisión de los reinicios de Rapid Trigger.
Causas fundamentales: por qué los interruptores magnéticos experimentan fricción irregular
La transición de interruptores mecánicos a magnéticos introduce desafíos de diseño únicos. En un interruptor mecánico estándar, el resorte de hoja proporciona retroalimentación táctil y contacto eléctrico. En un interruptor HE, la hoja está ausente, dejando el resorte como la única fuente de resistencia y el principal impulsor del movimiento de retorno.
1. Acabado imperfecto del extremo del resorte
Una de las causas más frecuentes del crujido es el "extremo cortado" del resorte. Durante la fabricación, los resortes se enrollan y luego se cortan a la longitud. Si el extremo cortado no se muele plano o se pule, queda una rebaba afilada. Durante la compresión, esta rebaba puede engancharse en la espiral adyacente o en la carcasa plástica del interruptor, creando un "enganche" táctil y un sonido arenoso.
2. Contaminación por partículas magnéticas
Debido a que los interruptores HE dependen de imanes, actúan como atractores de baja potencia para el polvo ferroso y las virutas microscópicas de metal. Si estas partículas entran en la carcasa del interruptor, a menudo migran hacia el resorte o el área del sensor Hall. Cuando el resorte se comprime, estas partículas actúan como un abrasivo, aumentando significativamente la fricción y creando un "crujido" que suena como arena en una caja de cambios.
3. Tolerancias de la Carcasa y el Vástago
El vástago de un interruptor HE debe ser no ferroso, típicamente construido de Polioximetileno (POM) para asegurar un desplazamiento suave. Sin embargo, la necesidad de un espacio de aire preciso entre el imán y el sensor requiere tolerancias estrictas. Si la carcasa permite un juego excesivo del vástago, el resorte puede inclinarse durante la compresión, haciendo que las bobinas rocen contra las paredes internas del vástago.
Resumen Lógico: Basado en patrones observados en registros de soporte técnico y retroalimentación de la comunidad de modificaciones, el ruido del resorte en interruptores HE es un problema de interacción mecánica. Aunque el sensor Hall es de estado sólido, las vibraciones físicas de un resorte "crujiente" pueden inducir microfluctuaciones en la salida de voltaje del sensor.
Procedimientos de Solución de Problemas y Modificación
Para los modificadores que buscan paridad de especificaciones con construcciones personalizadas de alta gama a un costo-rendimiento menor, resolver el crujido del resorte es un paso obligatorio. Los siguientes procedimientos se derivan del reconocimiento de patrones a nivel entusiasta y prácticas estándar de ingeniería mecánica.
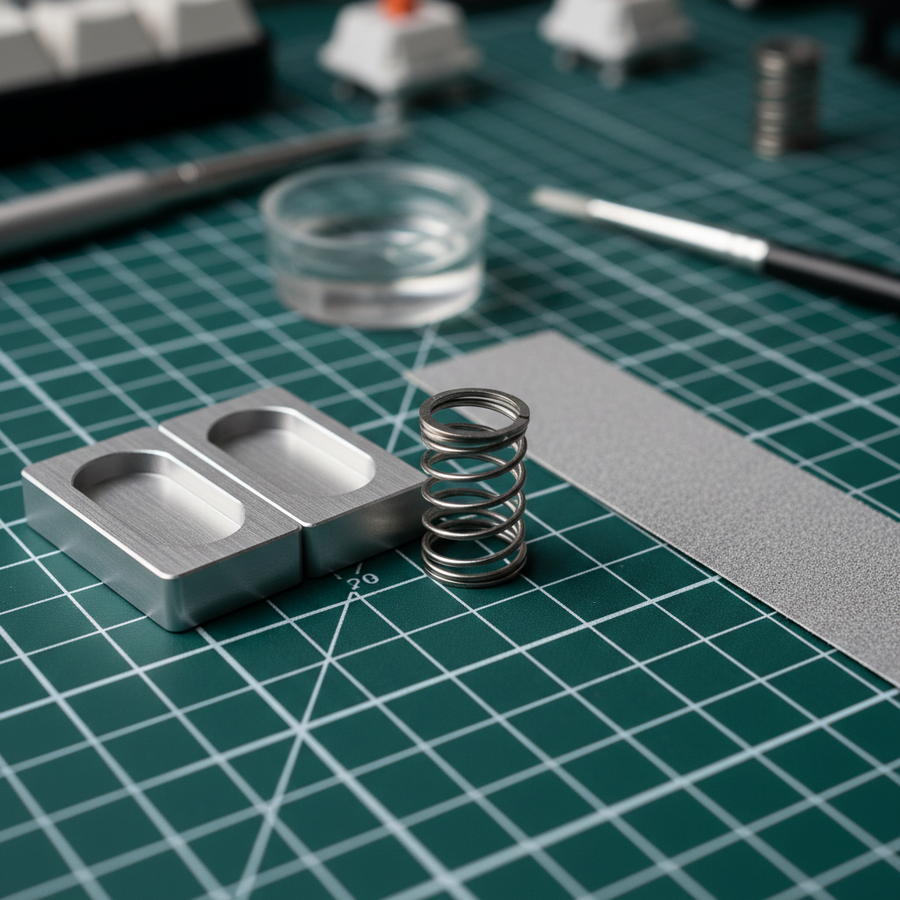
La Técnica de Refinamiento del Extremo del Resorte
Los modificadores experimentados encuentran que lijar ligeramente los extremos del resorte puede eliminar la mayoría de los ruidos rasposos.
- Desmontaje: Usa un abridor de interruptores no magnético para evitar interferencias con el imán interno.
- Lijado: Usando papel de lija de grano 2000, mueve el extremo del resorte en un movimiento circular durante 10–15 segundos. Esto elimina rebabas de fabricación y aplana la superficie de contacto.
- Lubricación: Aplica una pequeña cantidad de Krytox 205g0 o una grasa dieléctrica de alta viscosidad similar solo en las puntas del resorte. Evita "lubricar en bolsa" para interruptores HE a menos que estés seguro de que el lubricante es no conductor y no migrará al sensor.
Estabilización y Amortiguación de la Carcasa
Para reducir la resonancia aguda (ping) y estabilizar el vástago, las películas de interruptor de 0.15 mm hechas de PORON suelen ser más efectivas que la cinta tradicional. PORON proporciona amortiguación viscoelástica, que atenúa las frecuencias medias-altas (1kHz–2kHz). Esta estabilización asegura que el imán permanezca a una distancia constante del sensor, evitando el "jitter" en el punto de activación.
Entorno Limpio y Desmagnetización
Un factor crítico, a menudo pasado por alto, es el entorno. El desmontaje debe realizarse sobre una alfombrilla libre de pelusas. Antes de la reinstalación, usar una herramienta desmagnetizadora en las pinzas y en los resortes mismos (si han acumulado una carga residual) puede prevenir la acumulación de polvo ferroso después de la modificación.
Modelando el Rendimiento: La Compensación entre Latencia y Ergonomía
Para entender el valor de estas modificaciones, debemos analizar los beneficios cuantitativos de la tecnología de interruptores magnéticos frente a los riesgos físicos asociados con el proceso de modificación en sí.
Análisis 1: Ventaja del Disparador Rápido con Efecto Hall
Usando un modelo cinemático, comparamos la diferencia de tiempo de reinicio entre un interruptor mecánico estándar y un interruptor de efecto Hall con disparador rápido activado.
| Parámetro | Valor | Unidad | Justificación |
|---|---|---|---|
| Velocidad de levantamiento del dedo | 150 | mm/s | Promedio jugador competitivo |
| Distancia de reinicio mecánica | 0.5 | mm | Histéresis fija |
| Distancia de reinicio efecto Hall | 0.1 | mm | Disparador rápido dinámico |
| Latencia total mecánica | ~13 | ms | Incluye 5ms de rebote |
| Latencia total efecto Hall | ~6 | ms | Eliminación del rebote |
Nota de modelado: Este escenario asume una velocidad de levantamiento constante y sondeo estándar del MCU. Bajo estas condiciones, el interruptor de efecto Hall ofrece una ventaja de latencia de ~7ms por pulsación. Para una combinación de 3 teclas en un juego de ritmo o FPS, esto se traduce en una cadena de entrada ~21ms más rápida.
Análisis 2: Evaluación del riesgo ergonómico (Índice de tensión Moore-Garg)
Modificar más de 60 interruptores es una tarea repetitiva y forzada. Modelamos el riesgo ergonómico para un personaje "Modificador Competitivo" realizando una sesión de 3 horas de solución de problemas y lubricación.
| Variable | Multiplicador | Justificación |
|---|---|---|
| Intensidad | 2 | Pulsaciones de teclas con fuerza para pruebas |
| Esfuerzos por minuto | 5 | APM alto (~300) durante la validación |
| Postura | 2 | Ángulos incómodos de la muñeca durante el desmontaje |
| Velocidad | 2 | Movimientos rápidos y bruscos |
| Puntuación SI | 60 | Categoría: Peligroso |
Nota metodológica: El índice de tensión Moore-Garg es una herramienta de evaluación para el riesgo de lesiones por esfuerzo repetitivo. Una puntuación de 60 está significativamente por encima del umbral peligroso (>5). Esto sugiere que, aunque la modificación mejora el rendimiento del hardware, los usuarios deben priorizar descansos ergonómicos y herramientas adecuadas para evitar trastornos en las extremidades superiores distales.
Optimización del sistema: sondeo a 8000Hz y sinergia del hardware
Resolver el ruido mecánico es solo la mitad de la batalla; el hardware debe estar respaldado por la arquitectura digital del sistema. Conjuntos de alto rendimiento como el ATTACK SHARK X68HE Magnetic Keyboard With X3 Gaming Mouse Set están diseñados para un sondeo de 8000Hz (8K), pero esto requiere configuraciones específicas del sistema.
1. El intervalo de 0.125ms y la carga de la CPU
A 8000Hz, el teclado envía un paquete cada 0.125ms. Esto aumenta significativamente la frecuencia de las solicitudes de interrupción (IRQ) enviadas a la CPU. Los usuarios con procesadores antiguos de cuatro núcleos pueden experimentar "tartamudeo" en el juego porque el sistema operativo no puede programar estas interrupciones lo suficientemente rápido. Para un rendimiento óptimo a 8K, se requiere una CPU moderna con altas velocidades de reloj en un solo núcleo.
2. Topología USB y blindaje
Los dispositivos que operan a 8K son muy sensibles a la interferencia electromagnética (EMI). Recomendamos encarecidamente usar Puertos Directos de la Placa Base (E/S trasera). Usar conectores del panel frontal o hubs USB sin alimentación puede causar pérdida de paquetes y fluctuaciones. Para la conexión más estable, un cable trenzado de alta calidad con conector aviador metálico, como el ATTACK SHARK C07 Custom Aviator Cable para teclado magnético de 8KHz, proporciona el blindaje y la integridad de señal necesarios.
3. Actualización de pantalla y umbrales perceptuales
La suavidad proporcionada por una tasa de sondeo de 0.125ms es más perceptible en monitores de alta frecuencia de actualización (240Hz+). Aunque no existe una "regla del 1/10" (por ejemplo, necesitar un monitor de 800Hz para un ratón 8K), la trayectoria visual del cursor o el tiempo de movimiento de un personaje se representa con mayor precisión cuando la frecuencia de entrada supera significativamente la frecuencia de la pantalla.
Mantenimiento estratégico: asegurando la longevidad
Una vez resuelto el "crujido", mantener el teclado implica protegerlo de los mismos elementos que causan fricción.
- Protección contra polvo: Usar una cubierta acrílica transparente, como la ATTACK SHARK 87-key keyboard dust cover, cuando el sistema no está en uso evita que partículas entren en las carcasas de los interruptores.
- Capas acústicas: Para quienes buscan un perfil de sonido "thock" más profundo, agregar una capa de espuma Poron en la carcasa actúa como un filtro pasa bajos, absorbiendo el "ping" de alta frecuencia mientras preserva las frecuencias fundamentales más bajas del interruptor.
- Soporte para muñeca: Para mitigar los riesgos ergonómicos identificados en nuestro modelo de Índice de Tensión, un soporte firme e inclinado como el ATTACK SHARK Acrylic Wrist Rest with Pattern ayuda a mantener una posición neutral de la muñeca durante sesiones de juego y modificación.
Resumen técnico de soluciones
| Síntoma | Causa probable | Solución recomendada |
|---|---|---|
| "Ping" agudo | Resonancia del resorte | Lubrique los resortes en bolsa o agregue espuma en la carcasa |
| "Crujido" arenoso | Rebabas o fricción en el extremo del resorte | Lije los extremos del resorte (grano 2000) |
| Activación inconsistente | Contaminación magnética | Limpie la carcasa; use un desmagnetizador |
| Vibración del vástago | Tolerancias sueltas en la carcasa | Instale películas de interruptor PORON de 0.15mm |
Para un análisis más profundo de la mecánica de estos interruptores, consulte nuestra guía sobre Cómo lubricar interruptores mecánicos para un perfil acústico consistente. Si está considerando una transición completa de hardware, nuestra comparación de Magnético vs. Mecánico: ¿Qué tipo de interruptor gana para juegos? ofrece más datos sobre velocidades de activación y durabilidad.
Aviso legal: Este artículo es solo para fines informativos. Modificar o desmontar su teclado puede anular la garantía. La modificación técnica implica riesgos para el hardware y la salud personal (lesiones por esfuerzo repetitivo). Siempre consulte las directrices del fabricante y tome descansos frecuentes. Para información de seguridad sobre baterías de litio en periféricos inalámbricos, consulte las directrices de PHMSA (US DOT) Baterías de Litio.