
Personalizando la curva de fuerza: una guía técnica para cambiar resortes en interruptores de efecto Hall
La aparición de los interruptores magnéticos de efecto Hall (HE) ha alterado fundamentalmente el panorama de rendimiento para periféricos de juegos competitivos. A diferencia de los interruptores mecánicos tradicionales que dependen del contacto físico metal con metal para completar un circuito, los interruptores HE utilizan un imán y un sensor de efecto Hall para medir la posición precisa del vástago. Aunque esta tecnología permite funciones como Rapid Trigger y puntos de actuación ajustables, la "sensación" física—la resistencia y la velocidad de retorno—sigue siendo producto del resorte interno.
Para los entusiastas que buscan optimizar su hardware, cambiar los resortes de serie por pesos personalizados es un método principal de ajuste. Sin embargo, este proceso es significativamente más complejo que una modificación mecánica estándar. Debido a que los sensores magnéticos son sensibles a cambios de posición y flujo magnético a nivel micrométrico, cualquier modificación física en la carcasa del interruptor o en los componentes internos requiere un enfoque técnico riguroso para mantener la integridad del rendimiento.
La física de la detección magnética y la tensión del resorte
En un interruptor de efecto Hall, el sensor en la PCB mide la densidad del flujo magnético a medida que el imán (alojado en el vástago del interruptor) se acerca. El firmware traduce este cambio de voltaje en una medición de distancia. Según la Definición de Clase USB HID (HID 1.11), estos dispositivos deben reportar datos de entrada dentro de parámetros estrictos del protocolo, pero el comportamiento interno "analógico" del campo magnético es donde ocurre la personalización.
El resorte proporciona la fuerza hacia arriba necesaria para devolver el vástago a su posición de reposo. En los interruptores HE, todas las unidades son inherentemente lineales [DF5]. No hay un "bache" táctil ni un "clic" porque tales mecanismos introducirían fricción física que interfiere con el desplazamiento magnético suave requerido para la precisión de Rapid Trigger.
El papel de la velocidad de retorno en Rapid Trigger
La tecnología Rapid Trigger permite que una tecla se reinicie en el instante en que comienza a moverse hacia arriba, en lugar de esperar a que cruce un punto de reinicio fijo. La velocidad a la que la tecla regresa (determinada por el "empuje" del resorte en el punto de fondo) impacta directamente en la rapidez con la que un jugador puede volver a accionar la tecla.
Resumen lógico (ventaja de latencia): Basándonos en nuestro modelado de escenarios para juegos FPS competitivos, comparamos un interruptor mecánico estándar con un interruptor Hall Effect con un resorte de 35g. Bajo una velocidad agresiva de levantamiento de dedo de 150 mm/s, la configuración HE ofrece una ventaja teórica de latencia de aproximadamente 8 ms. Esto se debe a la reducción de la distancia de reinicio de 0.5 mm (histéresis mecánica) a 0.1 mm (HE Rapid Trigger) y a la eliminación del rebote del firmware.

Herramientas y precauciones de seguridad para componentes magnéticos
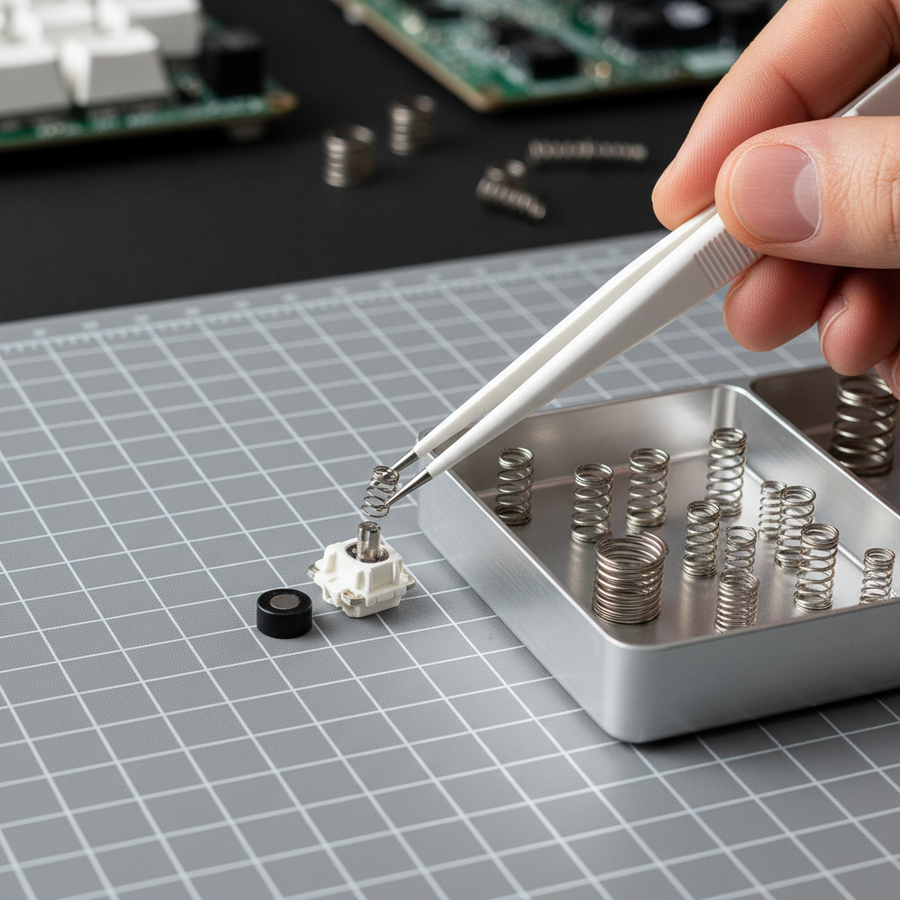
Modificar interruptores Hall Effect introduce riesgos no presentes en teclados mecánicos tradicionales. El problema más crítico identificado por expertos es el uso de herramientas metálicas. Acercar un destornillador magnetizado o pinzas de acero al imán interno puede alterar su polaridad o magnetizar la herramienta, causando lecturas inconsistentes del sensor.
Kit esencial para modding HE:
- Pinzas de plástico o cerámica: Son no conductoras y no magnéticas, asegurando que no interfieran con el campo magnético del interruptor durante el desmontaje.
- Abridor de interruptores: Un abridor estándar estilo MX suele funcionar, pero asegúrese de que esté hecho de polímero de alta calidad o aluminio no magnético.
- Krytox 105G0: Un aceite delgado de alto rendimiento usado exclusivamente para resortes.
- Software de calibración: El controlador oficial o configurador web para su modelo específico (por ejemplo, Attack Shark Official Driver).
Error común: polaridad del imán
Si un imán se cae del vástago durante un cambio de resorte, debe volver a insertarse con el polo correcto orientado hacia el sensor. Invertir el imán hará que el sensor lea el movimiento al revés o no registre la tecla en absoluto. Siempre realice una "prueba en seco" con un solo interruptor para verificar la orientación antes de procesar en lote todo un teclado.
Selección del resorte adecuado: peso y geometría
Al elegir resortes de reemplazo, los modificadores deben equilibrar el deseo de un toque ligero con los requisitos físicos del sensor.
Heurísticas de fuerza de activación
Basándonos en patrones observados en comunidades de entusiastas y datos de soporte técnico, utilizamos la siguiente regla general para la fuerza de activación:
- 30g y menos: Extremadamente ligero. Aunque rápido, esto a menudo conduce a activaciones accidentales por el peso de los dedos descansando sobre las teclas.
- 35g a 45g: El "Punto Ideal" para el juego competitivo. Este rango ofrece suficiente resistencia para evitar pulsaciones erróneas mientras mantiene una alta velocidad de retorno para toques rápidos.
- 50g y Más: Pesados. Adecuados para mecanógrafos que prefieren una sensación más deliberada, pero pueden aumentar la fatiga durante sesiones de juego con alta APM (Acciones Por Minuto).
Resortes Lineales vs. Progresivos
Los modders experimentados a menudo prefieren resortes progresivos para aplicaciones de efecto Hall. A diferencia de los resortes lineales, que tienen un peso constante durante toda la pulsación, los resortes progresivos aumentan la resistencia a medida que se comprimen. Esto proporciona una "amortiguación" táctil antes del fondo, lo que puede ayudar a los jugadores a sentir el final de la pulsación sin un golpe físico, reduciendo potencialmente la fuerza de impacto en los dedos.
Resumen Lógico (Riesgo Ergonómico): Nuestro análisis usando el Índice de Tensión Moore-Garg (SI) indica que usar resortes ultra-ligeros de 35g en un escenario de juego de alta intensidad puede resultar en un puntaje de riesgo "Peligroso" (~33.7) por tensión repetitiva. Esto se debe a la falta de resistencia que obliga a los músculos a trabajar más para estabilizar los dedos durante movimientos rápidos. Los usuarios deben equilibrar las ganancias de rendimiento con descansos adecuados.
Procedimiento Paso a Paso para Cambiar Resortes
1. Preparación y Desmontaje
Asegúrate de que el teclado esté desconectado. Usa un extractor de interruptores para retirarlos de los sockets hot-swap. Coloca el interruptor en tu herramienta de apertura y aplica presión uniforme hasta que los clips de la carcasa se liberen.
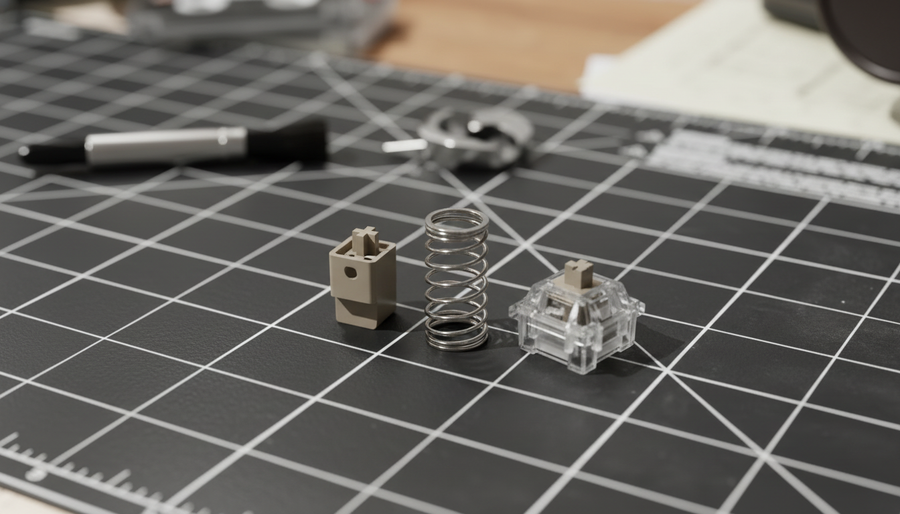
2. Retiro y Lubricación del Resorte
Retira el resorte original. Al aplicar lubricante, usa la técnica de "lubricación en bolsa" o aplica una cantidad mínima de Krytox 105G0 solo en los extremos del resorte.
- Advertencia: Evita que el lubricante entre en contacto con el imán o el centro del resorte. El exceso de aceite puede atraer polvo o interferir con la detección magnética si migra al área del sensor.
3. Instalación del Resorte
Coloca el nuevo resorte sobre el poste central de la carcasa inferior. Alinea cuidadosamente el vástago (que contiene el imán) para que quede centrado sobre el resorte. Asegúrate de que el imán siga orientado correctamente (polos norte/sur) según tu verificación inicial.
4. Reensamblaje y Colocación
Vuelve a colocar la carcasa superior sobre la base. Deberías escuchar un clic distintivo cuando los cuatro clips encajen. Antes de reinstalar los interruptores en el teclado, presiona manualmente cada uno para asegurarte de que no haya "crujido del resorte" ni atascos.

El Paso Final Crítico: Recalibración del Software
El error más común que cometen los modificadores es saltarse la calibración del software después del reensamblaje. Cada resorte tiene ligeras variaciones en longitud y tensión, lo que puede desplazar la posición de reposo del imán por fracciones de milímetro. Sin recalibración, el firmware puede creer que la tecla está parcialmente presionada o no alcanzar los marcadores de recorrido del 0% o 100%.
Cómo Calibrar:
- Conecta el teclado y abre el software de configuración.
- Navega a la pestaña de "Calibración" o "Mantenimiento".
- Sigue las indicaciones en pantalla, que usualmente implican presionar cada tecla hasta el fondo y soltarla.
- Verifica los ajustes de la "Zona Muerta". Una zona muerta de 0.1mm es estándar para prevenir entradas "fantasma" causadas por el temblor del resorte en la parte superior del recorrido.
Según la Guía de Configuración del NVIDIA Reflex Analyzer, la latencia del sistema es una cadena. Mientras que el cambio de resortes optimiza la entrada física, asegurar que la calibración de tu software sea precisa es lo que permite que el hardware se comunique eficazmente con el sistema operativo y el motor del juego.
Modelado de Escenarios: Ajuste Competitivo y Rendimiento
Para proporcionar un marco de decisión práctico, modelamos dos escenarios de usuario distintos basados en el Libro Blanco de la Industria Global de Periféricos para Juegos (2026).
Escenario A: El Competidor FPS de Alta Sensibilidad
- Objetivo: Máxima capacidad de respuesta Rapid Trigger.
- Recomendación: Resortes progresivos de 35g con un punto de actuación de 0.1mm.
- Beneficio: El resorte ligero permite un reinicio casi instantáneo.
- Riesgo: Alto riesgo de entradas accidentales si el usuario tiene un estilo de mano "pesada" en reposo.
Escenario B: El Usuario Híbrido (Trabajo y Juego)
- Objetivo: Comodidad durante largas sesiones de escritura con juego ocasional.
- Recomendación: Resortes lineales de 45g con un punto de actuación de 1.5mm para escribir y un perfil intercambiado de 0.5mm para juegos.
- Beneficio: Reduce errores de tipeo mientras sigue ofreciendo los beneficios de la tecnología HE.
- Riesgo: Velocidad de retorno ligeramente más lenta en comparación con la opción de 35g, aunque insignificante para juego no profesional.
Apéndice: Transparencia en el Modelado y Metodología
Los datos cuantitativos presentados en esta guía se derivan de modelado de escenarios deterministas y heurísticas biomecánicas establecidas. Están destinados a fines informativos y no representan un estudio de laboratorio controlado.
Nota de modelado (Parámetros reproducibles)
| Parámetro | Valor / Rango | Unidad | Justificación / Fuente |
|---|---|---|---|
| Velocidad de elevación del dedo | 150 | mm/s | Estimado a partir de estudios de movimiento en juegos de alta velocidad |
| Distancia de reinicio HE | 0.1 | mm | Límite típico de implementación de disparo rápido |
| Distancia de reinicio mecánico | 0.5 | mm | Histéresis estándar estilo Cherry MX |
| Multiplicador de intensidad | 1.5 | - | Alta intensidad para resortes de 35g (Moore-Garg SI) |
| Multiplicador de velocidad | 2.0 | - | Movimientos de dedos de alta velocidad en FPS |
Condiciones límite:
- Modelo de latencia: Asume velocidad de elevación constante y tiempo de procesamiento MCU despreciable. La variación real puede ser de +/- 1ms.
- Índice de Tensión: Esta es una herramienta de evaluación de riesgos, no un diagnóstico médico. La susceptibilidad individual a lesiones varía significativamente.
- Acústica: El perfil de sonido (Thock vs. Clack) es subjetivo y está influenciado por la superficie del escritorio y la acústica de la habitación.
Resumen de mejores prácticas técnicas
El intercambio exitoso de resortes en interruptores Hall Effect requiere un cambio de mentalidad respecto a la modificación mecánica tradicional. Al priorizar herramientas no magnéticas, seleccionar pesos basados en los requisitos de velocidad de retorno y, lo más importante, realizar una recalibración completa del software, los entusiastas pueden lograr un nivel de ajuste de rendimiento previamente inalcanzable en el mercado de periféricos.
Para más información sobre el mantenimiento de tu construcción personalizada, considera nuestra guía sobre Cómo lubricar interruptores mecánicos para un perfil acústico consistente o explora las diferencias en Calibración de interruptores magnéticos para escritura con fuerza Ultra baja.
Aviso legal: Este artículo es solo para fines informativos. Modificar los interruptores de tu teclado puede anular la garantía. Las modificaciones técnicas que involucren componentes electrónicos deben realizarse con precaución. Si experimentas dolor persistente en la muñeca o la mano, consulta a un profesional médico calificado.